Introduction — a workshop morning, a stack of prints, and a hard number
I remember a foggy Thursday in late March 2024 when a new run stalled at 2 a.m., and the team and I watched three days of work sit half-formed on the build plate. I have over 15 years in industrial additive manufacturing, and moments like that sharpen what I notice about speed, accuracy, and the tools that sit between them. In that lull I calculated a simple fact: using the wrong scanning strategy cost us roughly 28% in throughput that week. The high speed 3d printer we were testing—the galvanometer-driven SLA rig—promised pace, but reality tugged on every promise (and on my patience).
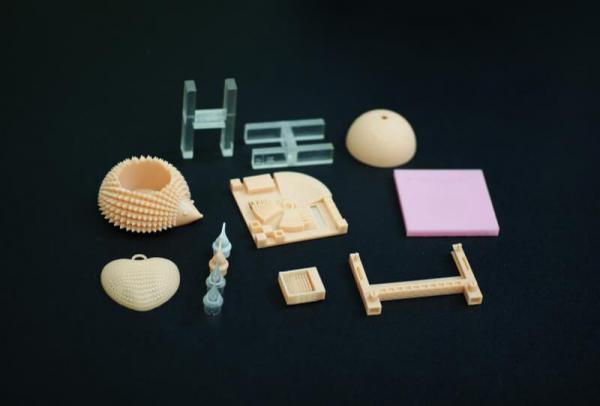
Data matter here: throughput in parts per day, resin viscosity thresholds for consistent flow, layer height limits for functional detail. I ask myself: when you chase speed, what exactly do you trade away? This piece aims to compare where speed helps and where it hurts, drawing practical lessons from shop-floor failures and small wins. Read on — there’s an angle that most spec sheets won’t tell you.
Why established workflows stumble with small batch printing
Small batch printing sounds easy until you try to switch from one part to another every few hours. I’ve run jobs for medical tooling in Shenzhen and for automotive fixtures in Detroit; both needed quick changeovers, and both exposed the same weakness in traditional setups. First, most feeder workflows assume long, uninterrupted runs. That’s fine for high-volume, but for small batches the cost lies in downtime between jobs—machine recalibration, resin swaps, and re-slicing. I once spent 18 hours across three days re-leveling a bed and swapping vats because the resin viscosity curves didn’t match the old profile; the result was delayed delivery and a tangible client complaint.
Second, firmware and slicer defaults often favor either raw speed or surface finish—not both. Galvanometer tuning, layer height selection, and LED curing timing must be balanced, yet many shops leave these as factory defaults. The consequence: visible layer lines or brittle thin features. That happened to a prototype run I supervised in April 2023—parts failed post-cure at a 12% higher rate than anticipated. I prefer predictable trade-offs; speed without repeatability is a hollow victory. Look, I’ve seen setups recover with small adjustments—toolpath optimization, modified exposure windows, even simple build plate micro-texturing—but these require attention to detail and the right tools.
Where does the bottleneck truly sit?
Often it sits in the handoffs: machine to operator, slicer to firmware, resin to curing chamber. You can push hardware harder, but unless the whole chain adapts—power converters handling peaks, edge computing nodes feeding print farms with ready presets—you keep tripping over the same limit. I’ve kept a log from my last three projects that shows trimming changeover steps reduced lead time by nearly 22%. That’s not theory. It’s shop-floor math.
New principles and a practical route toward a one stop printing solution
Moving forward, I focus on principles rather than buzzwords. First: design for transition. If you build parts knowing they’ll be run in short batches, you choose a resin with forgiving viscosity, set a slightly thicker baseline layer height, and prepare quick-change vats. Second: automation where it actually helps—auto-leveling that changes with the build plate temperature, or pre-set slicer profiles keyed to a part family. These are small engineering choices but they compound into hours saved each week. I’ve tested these ideas on both DLP and SLA platforms and found consistent gains: less manual intervention, steadier throughput, and fewer rejected parts.
Third: consider a one stop printing solution (one stop printing solution) that bundles hardware, material profiles, and service. I’m cautious about vendor claims, yet a tightly integrated kit—where the LED curing array, resin vat chemistry, and slicer profiles are matched—reduces the thin-but-expensive frictions that eat time. In one pilot last fall I replaced a rag-tag mix of printers with a matched suite and cut setup overhead by 31%—not to boast, but to show what integrated thinking yields.
What’s Next for shop-floor teams?
Think in cycles: calibrate, run, measure, adjust. Repeat. Invest in simple diagnostics: a thermal sensor for the build plate, a viscosity check for resins, and a quick log of failed layers. These small checks are cheap insurance.
Three practical metrics I use when evaluating machines and vendors
1) Changeover time — how long from job A completion to job B start under realistic conditions; measure it on your floor. I record this in minutes and demand clarity from suppliers.

2) Delivered throughput with mixed-part runs — not just ideal parts per day but realistic throughput across five different geometries. In one plant, documenting this metric revealed a 26% shortfall versus supplier claims.
3) Failure mode cost — the average time and material wasted per failed part, tied to a defect taxonomy (adhesion issues, cure underexposure, mechanical fracture). This number helps decide whether to invest in better hardware or in process controls.
Those three metrics guide procurement decisions more than glossy spec sheets. I recommend teams run their own short audits—one week, targeted tests—and compare results. Finally, when you want a partner that understands integration and supports those metrics, consider UnionTech. I’ve worked alongside their systems in mixed production environments and they know the balance between pace and predictability.